This is probably one of the most interesting, unusual, useful, and, possibly – off-putting – pieces in my eclectic collection of antiques.
This was something that I scored on the great online flea-market we call eBay (remember folks! I’m on eBay now!). It isn’t something especially common, and I thought it’d make a great little novelty addition to my collection.
This solid silver rectangular pendant, with a ring-top and a pair of toggles on the sides was something that I stumbled across completely by chance on the internet, and once I realised what it was, I decided that I simply had to have it, even if only for the novelty aspect of the whole thing!
Very common in Chinese culture, these ear-curette and toothpick pendants were extremely popular in the late 1800s and early 1900s, and were commonly used by Chinese women to remove stubborn earwax from their ear-canals, or crud from between their teeth after meals. In an age before consistent, and quality dentistry, anything extra that you could use to keep your teeth clean would’ve been very useful!
This particular pendant has two slide-out implements: A curette (an earwax-spoon), and a toothpick. They were most commonly made of either gold (usually 18kt), or silver (800, 900, or 925 sterling), and were popular as trinkets, gifts and practical little doodads to carry around with you on a day out.
Here, you can see the toothpick. Fully extended, the whole thing is about 3 inches long, from the point of the toothpick to the end of the ringtop. The slide-toggles are shaped like flowers, and the sides of the pendant are also decorated with leaves and flowers.
On the other side is the little hook/spoon-shaped scoop for removing earwax.
Pendants like this one were commonly worn around the neck with a matching chain of either gold, or in this case – solid silver. My grandmother had a pendant like this in solid gold which I remember from my childhood. It was lost in a move and we never saw it again, but it is nice to have this little trinket – a unique piece of Asian silverware, not likely to be found manufactured anywhere else in the world!
Although this is probably the smallest antique I’ve ever bought, at just over 1.5 inches long, I think that it ranks up there as one of the most interesting, because of how unique it is. They aren’t common, and so far as I know, aren’t made in modern times. At least, not in this configuration! I hope you found this short posting enjoyable and got the chance to see something that perhaps, you’ve never seen before, or perhaps, not even thought might exist!
You know…when you’re stuck at home in lockdown, with nothing to do but watch Youtube videos about the Cinnamon Challenge, or how to tune a ukelele, or how to sing Christmas carols in LOLspeak – a skill which will surely impress all four of your grandparents come Christmas time – you start going a little stir-crazy, and you start thinking about the weirdest, craziest shit that you wouldn’t otherwise think of.
As I sat here at my desk, randomly watching another video of “Ten Celebrities Who Had it all and Blew it!…AGAIN!” or whatever, other, asinine twaddle people upload on the internet these days…my mind started wandering…as it’s want to do…to all kinds of random thoughts – like – what would people be buying other people for Christmas this year? Or for birthdays? Or anniversaries, or whatever? What kinds of desirable consumer-goods are there out in the world today which people just have to have? The latest iPhone? A new laptop? A sparkly purple pimp-mobile with tricked out chrome rims?
And I started to wonder…what were the biggest status symbols of times past? What did our ancestors wish they had, or did have, and used, to show off their status in the world, to other people, and to the higher-ups around them?
In this posting, I’ll be looking at some of the most common, uncommon, strangest, or most unlikely status symbols that have existed throughout history! These aren’t in any sort of order, but I’ll try and include as many as possible…
Status Symbol: Land Symbolises: Wealth & Connections
Since the dawn of humanity, right up to the present day – ownership, control, use, and monetisation of pure, and simple land, has been a symbol of wealth, power, status and influence. From the lowest freeborn peasant, to Lord Muchstuff to the manor born, and even His Majesty King Morestuff, land has been important. From Ancient Rome to Medieval Europe, and even right up to the modern day – land has been important. Back then, they called it “freeholding” – today, we call it – “real estate” – but it’s still land.
In medieval times, in theory, the entirety of a kingdom’s land was the sole ownership of the king himself. The king gave parcels of land to nobility, clergy, the warrior aristocracy, lesser royals, or close friends and advisors, as gifts for them to own – either outright – or to rent. A nobleman who owned the land bore allegiance to the king (his “liege lord”), and was in charge of collecting the king’s taxes on the land he controlled, protecting the king’s subjects who lived on the land, and of upholding the laws and the King’s Peace.
Land – especially large parcels of it – were status symbols because if you owned land, it meant that you were in the good graces of the king, who thought enough of you to sell you or let you rent, in some cases, several thousand acres of his own kingdom. Being a landowner also meant that you could use the land to make money – either by farming, or by renting it out again to tenant-farmers, who farmed the land for you – paid you rent and taxes, and who did all the hard labour.
In many of the most essential ways – ownership of land, the status it brings, still exists today. The bigger someone’s house is, or the grander their address is, the more impressed we are. Would you prefer to receive an invite to a party at someone’s apartment? Or an invite to a party on someone’s private estate?
Status Symbol: Libraries & Books Sybolises: Education
Apart from land, one of the greatest status symbols of history was literature: Physical books, scrolls, maps and documents. Whether or not they were accurate, reliable or even truthful, was rarely the point – the contents were not nearly as important as was the mere fact of personal ownership!
During the medieval era, and for a significant chunk of the Renaissance in the 1400s and 1500s, books were prized, treasured, intensely valuable possessions. Since all books had to be written out laboriously by hand using a quill pen and expensive paper or vellum, producing a book of any substantial size, regardless of its contents – was a very expensive, and time-consuming process. Paper had to be sourced, ink had to be ground up and diluted, quills had to be collected, dried, cut and shaped, and then you had to have the time, and the knowledge to write the contents of the book itself!
Because of this, owning books was a sign of extreme wealth, since having gone to all that effort to make one book – a writer was going to be sure to sell it for as much money as they could! But owning a book – or to be more precise – an entire library of books – indicated, not only great wealth – but also education. At a time when most people couldn’t read, and never had the chance to – books, scrolls and other documents, symbolised access to education and higher learning, at a time when most people had neither the time, funds, or resources to learn how to read or write.
The status of books died away somewhat by the 1500s and 1600s, with the steady spread of the printing press, which made books significantly cheaper and faster to produce, but their status remained high enough that many grand country houses built in the 1600s, 1700s, and even the 1800s, were constructed with expansive libraries and reading-rooms to show off the owner’s wealth of collected knowledge.
Status Symbol: Obesity Symbolises: Ease of living
For millennia throughout human history, one of the most prominent status symbols ever was obesity. At a time when growing, farming, hunting, catching, preparing and preserving food was extremely labour-intensive, and when physical labour such as tree-felling, lumberjacking, mining, farming, and other occupations burned up precious calories, obesity of any kind was virtually unheard of. Because of this, obesity, and pale skin were considered signs of wealth, privilege and plenty. Not for nothing is the Chinese God of Prosperity – Cai Sen – (often mistaken for Buddha) – traditionally depicted as being good-natured, happy, and extremely obese!
A cartoon of George IV, who was as famous for his gluttony as he was for his womanising, literally bursting out of his breeches
To be able to achieve such awe-inspiring obesity, you had to have not only enough food to eat, but enough servants to do all the work which you therefore wouldn’t need to, allowing you to live a life of luxury! This also meant that you could stay indoors, away from the sun while enjoying the high-life. This preference for pale skin and rich living can be seen in figures such as Queen Elizabeth the First, who famously slathered white lead makeup on her face to appear pale and beautiful, and in the fairytale “Snow White” where she is described as having hair as black as ebony, lips as red as blood, and skin as white and pure as snow.
Status Symbol: Gout Symbolises: A rich diet & access to expensive foods
Gout is a condition where hard lumps of crystalised uric acid (lumps known as tophus or tophi) build up in a person’s joints – in particular, the toes and knuckles (but most commonly in the big toe), caused by a heavy diet of red meat, sugar, salt, and excessive consumption of alcohol and other rich, fatty foods. As such foods as sugar, chocolate, and cakes were rare, and beef and mutton were expensive, being able to eat as much of this stuff as you wanted, to the extent that you could contract gout from it was seen as a sign of extreme affluence!
Despite the, at times, excruciating pain, which could render a gout-sufferer all but immobile for days, or even weeks on end, until the tophi broke up or were dissolved (usually aided by applying heat to the affected joints) – gout was seen as a huge status-symbol – it was almost fashionable to try and get it, because it proved how immensely privileged and wealthy you had to be! Because of this association with wealth, privilege and a rich diet, for centuries, gout has been known as “The Disease of Kings“.
‘The Disease of Kings’. Gout was so unbearably painful that it was nigh impossible to walk. Sufferers had their feet bandaged to control the swelling, and elevated on pillows or ‘gout stools’ to relieve the pressure on the joints. There was really nothing else to do except to wait for the attack to pass…which could take up to TWO WEEKS to go away!…Ouch!
One of the most famous sufferers of this ‘royal disease’ was His Royal Highness, Prince George, Prince of Wales, the Prince Regent – later known as George IV. Famous for throwing extravagant banquets, George IV was a lecherous whoremonger, known for chasing two things: Food, and women. His waistline exploded and his obesity shot up. This on its own would’ve been bad enough, but his nonstop indulgence caused agonising flare-ups of gout, which would’ve been treated by warming, resting and elevating the foot, and by taking copious amounts of painkillers – usually in the form of tincture of laudanum – a mix of opium and alcohol – the most common painkilling drug of the era.
Status Symbol: Sugar, Chocolate, Jelly, Ice-Cream, etc. Symbolises: Extravagant living!
In medieval times, and even for hundreds of years afterwards, certain foods were so hard to obtain or hard to produce that they were – right up until the modern era – considered luxuries. Anybody who could afford to eat these foods were living high on the hog! Here’s a list of some of the various foods that were once considered to be highly desirable status foods!…and they’re not always the ones you might expect.
Sugar
For centuries, access to sugar was incredibly rare. Extracted from sugar-cane, grown on large plantations in tropical climates, and processed into raw sugar-crystals before being exported, sugar was a supreme luxury in the Renaissance era, when getting to enjoy it in Europe meant that it had to come on the most amazing, round-the-world voyages from the Far East, or the Caribbean. As late as the 1700s, King George III declared that in the event of war with the American colonies, the French, or the Spanish, and their colonial possessions in the new world, Britain could lose just about anything except its sugar plantations – the enormous amounts of money that sugar brought to Britain were too valuable to risk falling into enemy hands!
Sugar did not start becoming cheaper until the 1800s, when it was discovered that sugar could also be extracted from the much more easily-grown sugar-beet, which could be cultivated in more temperate climates. Before this time, sugar had been so rare that only those with significant wealth were able to afford it.
Chocolate!
Some are convinced that it’s evil in physical form, others are sure that this is the very food of the gods themselves! For centuries, chocolate has been one of mankind’s most sought-after treats, but for much of history, chocolate was nigh on inaccessible, and even when it was, it would be centuries before it could be enjoyed by the masses.
Harvested from enormous cacao-pods grown in tropical countries, chocolate comes from the cocoa beans stored inside the pods. And here’s something you may or may not know: Chocolate in its raw state tastes disgusting!
It’s bitter and rank and nigh inedible! And even if you could get a hold of it, the processes to extract chocolate from the beans were extensive!
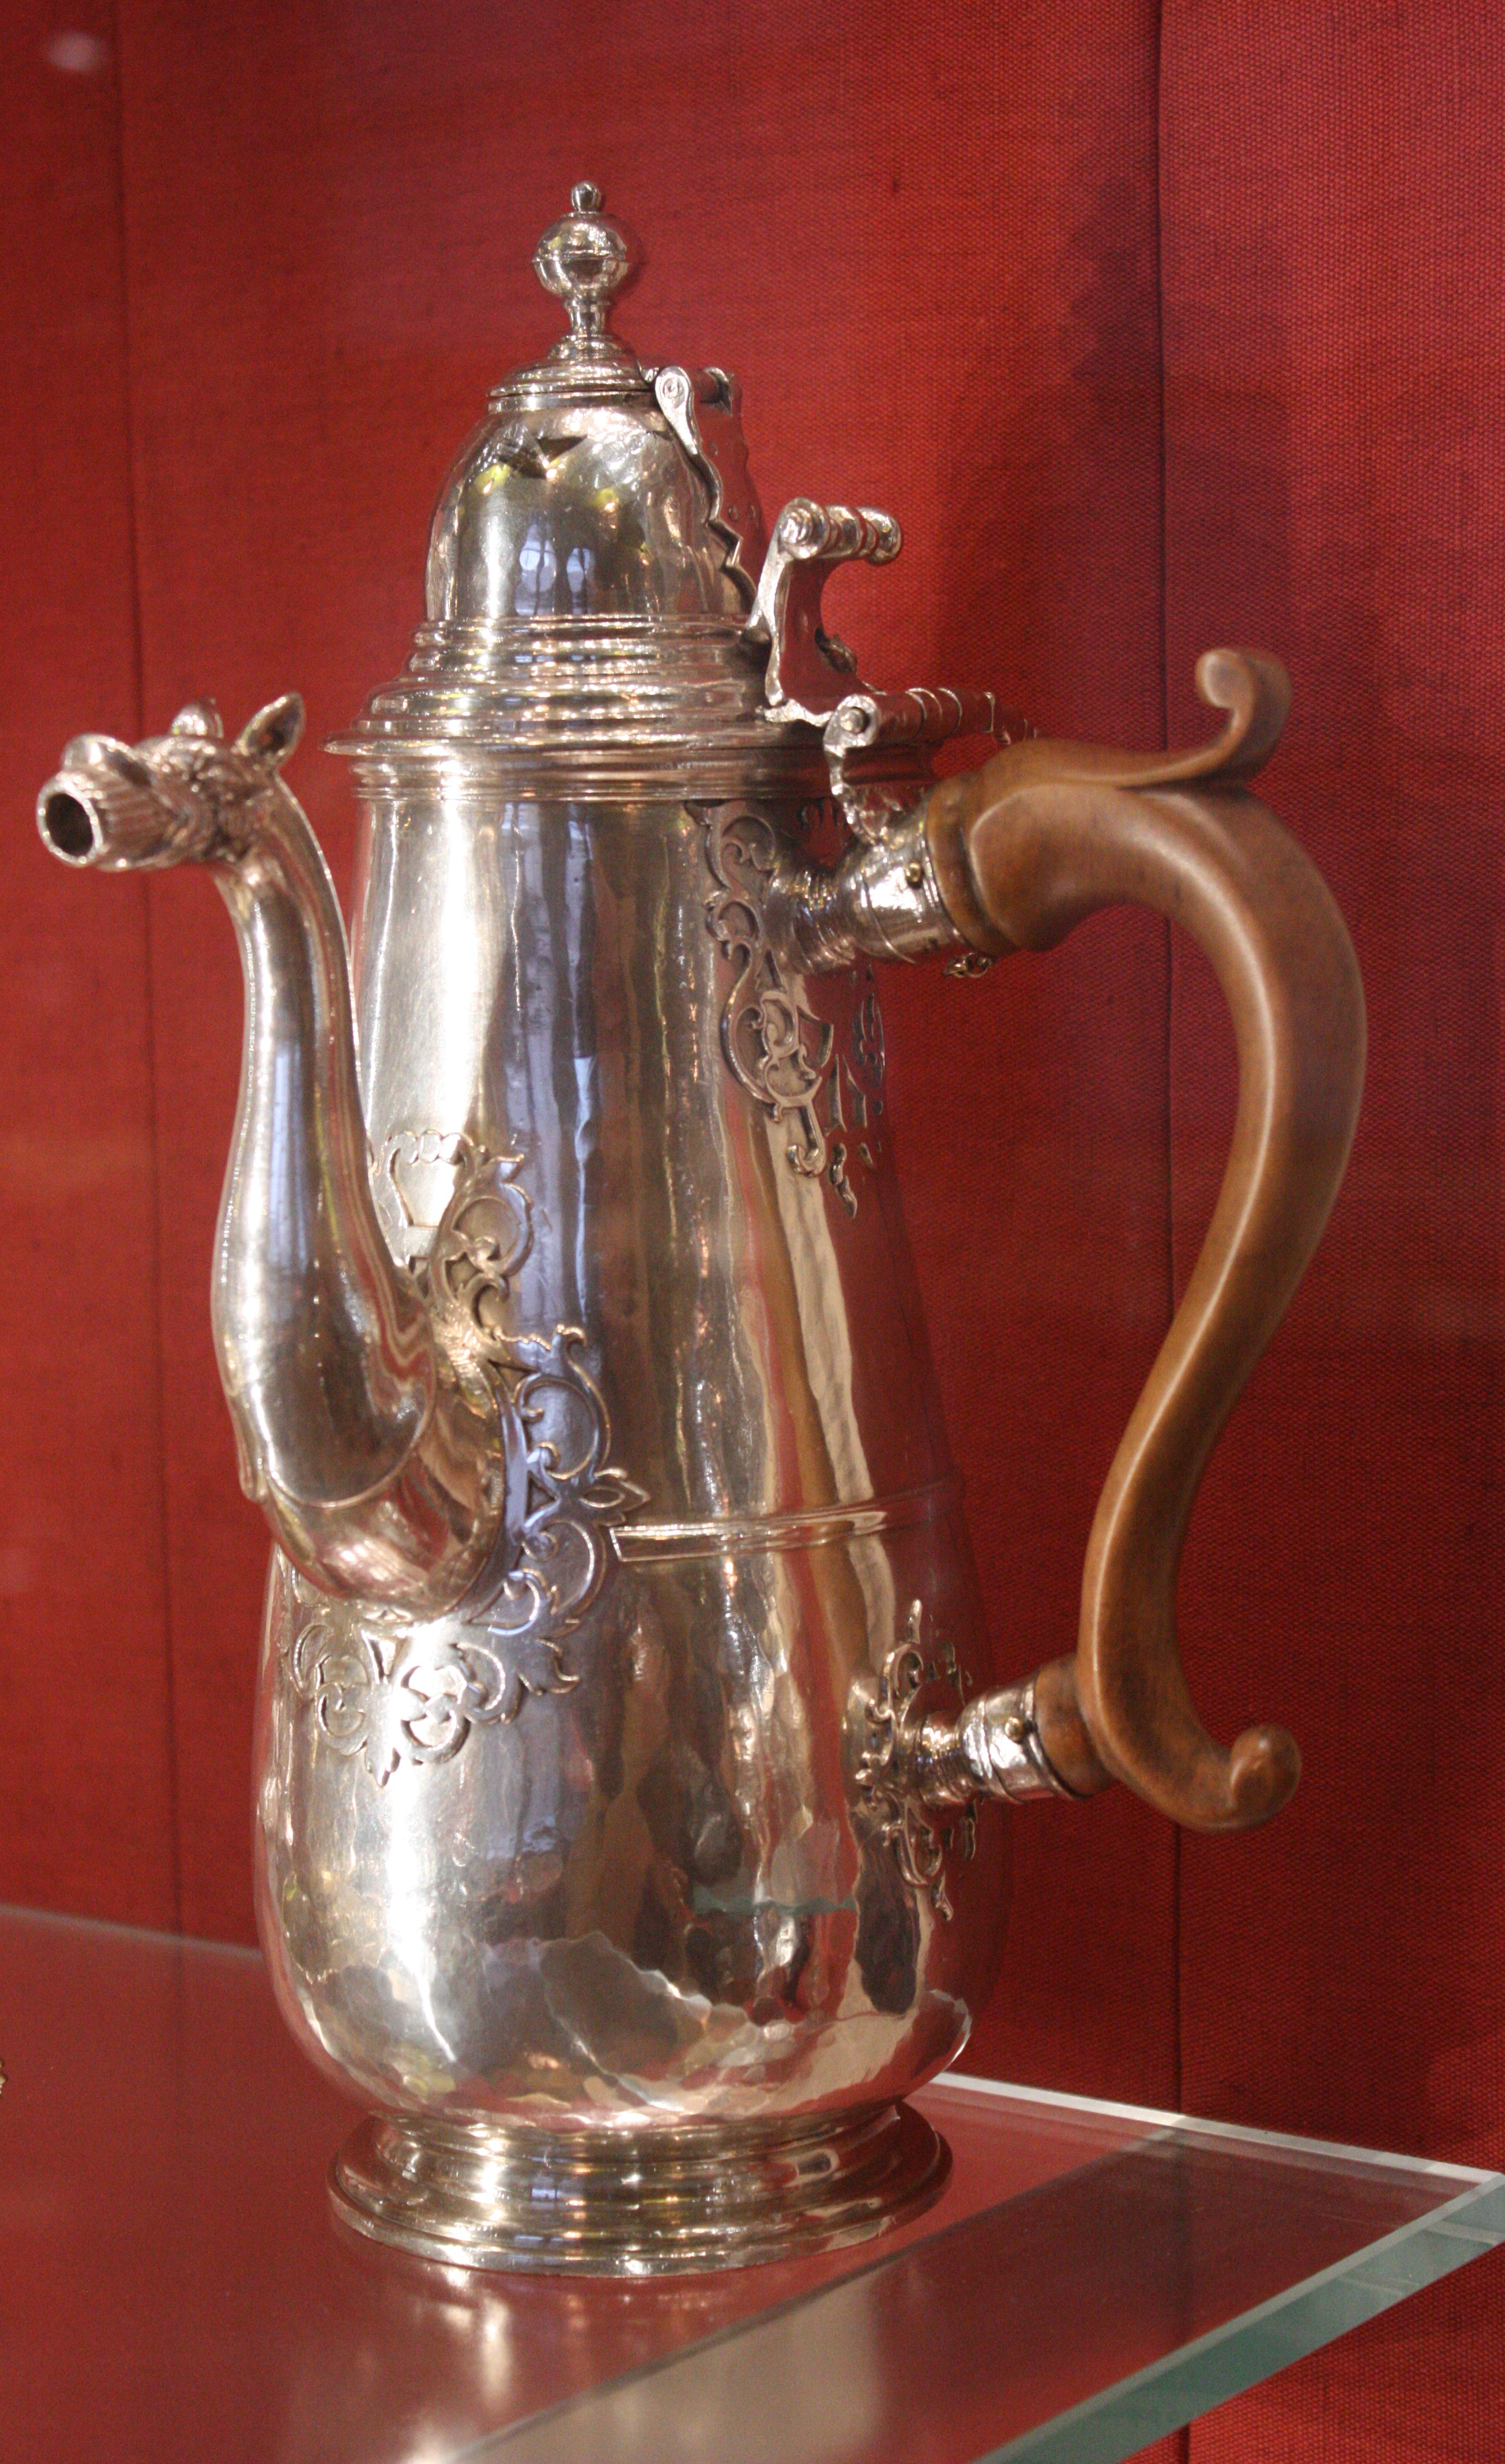
A solid silver chocolate pot. The hinged finial at the top is for inserting a molinillo – a long, elegantly-carved wooden whisk – into the pot. Molinillos were used for whipping, mixing and frothing up the delicious, delicious hot chocolate! Mmmm…
First, the beans have to be dried, then crushed, then ground up, and finally, the pure cocoa has to be mixed with other ingredients to make it palatable – such as sugar, water, eggs or milk. Since sugar was already so expensive, combining sugar AND chocolate was considered exceptionally extravagant.
For centuries, chocolate wasn’t even a food – it was a drink! From the 1500s until the 1800s, chocolate existed in only one form: as drinking-chocolate. What we’d call today – hot chocolate. The only way to physically eat chocolate was to incorporate the cocoa and sugar mass into something else – like a cake, pie, tart or a tray of cookies. Eating chocolate on its own did not happen until the Victorian era. Only when this became possible, and mass production of the first chocolate bars began, was chocolate finally democratised to the peasants and plebians!
Pineapples
Introduced to Europe in the late 1500s and early 1600s, the humble pineapple was the latest fruit from the New World to capture the imagination of the old. Nothing like it had ever been seen before, and because pineapples were very difficult, indeed, almost impossible, to grow in a European climate, getting your hands on one was no mean feat!
To grow pineapples in Europe, the only way to do it was to cultivate the plants in a large, glass greenhouse, usually on the private estate of some wealthy landowner. The warm, humid micro-climate inside a greenhouse allowed pineapples to grow, and owning and getting to eat pineapples was an enormous luxury! Greenhouses designed or built specifically for growing pineapples became known as ‘Pineries’. Because why not?
King Charles II, the ‘Merry Monarch’, being presented with a ‘pine apple’ in 1675
Just being able to see, and hold a pineapple – never mind eating one! – was such a rarity that wealthy people used to – and I’m not making this up – RENT – pineapples from other people! Yes indeed! You could go up to a guy, a friend of yours, perhaps, whom you knew owned a pineapple, and you could ask to borrow or rent it! You know, to have it as a centerpiece at your latest dinner-party or banquet! Showing off a physical pineapple showed that not only were you rich enough to rent one, but that you had connections to people who could grow them – a massive brag back in the 1700s!
Jelly & Ice-Cream
In an age before freezers, refrigerators and instant-foods, both jelly and ice-cream were considered extreme luxuries. Jelly – produced by boiling out the gelatin from the hooves of animal-trotters – took hours to create, with the gelatin being continually boiled, skimmed, refined, and boiled again, to extract pure gelatin, which could then be flavoured, shaped and coloured to produce jelly.
Ice cream, made from eggs, cream, sugar and flavourings, was another extreme luxury. Sugar was expensive, and without freezers, the only way to produce ice-cream was to place it in a bath of salt and ice – two more very expensive commodities – which again, increased the price (and status) of ice-cream.
It wasn’t until the mid-1800s that ice-cream could be produced relatively easily at home, or on an industrial scale, with the invention of hand-cranked ice-cream machines, which whipped the mixture inside a metal canister surrounded by ice and salt. This process made ice-cream cheaper, faster to produce, and better-tasting, as the aerated mixture (caused by the constant stirring and freezing) was lighter, and smoother on the tongue.
Status Symbol: The Fountain Pen. Symbolises: Modern Technology and Taste!
Since the dawn of writing, thousands of years ago, mankind has struggled and striven for countless lifetimes, to produce a writing instrument which contained its own ink-supply, and which could operate independently of a separate inkwell. After many false starts and mistakes…and a lot of mess…the fountain pen finally came of age in the late 1800s, with visionaries such as George Parker and Lewis E. Waterman creating the essential elements that would make the modern fountain pen possible.
While fountain pens in the early days were laughably simplistic items, comprising little more than a cap, a nib, feed, section to hold it all together, and a tank for the ink – they were incredibly expensive, and were considered real luxury items! Owning one of these newfangled “reservoir pens” as they were originally called, was a mark of pride and distinction!
Fountain pens have remained a status symbol for over 100 years. The Montblanc Meisterstuck No. 149, AKA, the Diplomat, has been the most famous pen in the world since its creation in 1952
From the late 1800s until the middle of the 20th century, most fountain pens were expensive, and while cheap “third-tier” pens did exist, the cost of a new fountain pen was often out of the reach of most people, which is why institutions like schools, banks, hotels, etc, continued to rely on old-fashioned dip pens, well into the 20th century. They were simply cheaper, easier to use, and easier to replace.
Although ballpoint pens have largely usurped the fountain pen’s throne since the end of the Second World War, fountain pens are making a big comeback in the 21st century, and there is an avid global community of collectors, users, repair-technicians and manufacturers still thriving today.
The chilly winter air, the flurries of snow, the heaving, choking smog, the hissing, flickering luminescence of gas-fired streetlamps. Footsteps in the distance. Somewhere, a clock-tower chimes midnight.
Suddenly, a scrambling of feet! A struggle! The sound of a body falling, and the distant ‘splash!’ of something heavy hitting the water.
A moment of silence. And then the crisp midnight air is sliced in half with the shrill, discordant screeching sound of a whistle…
The Victorian era was obsessed with four things: Crime, death, standardisation, and modernisation. In sixty years, technology advanced by leaps and bounds unheard of in previous lifetimes, and one object encapsulated all these things in one – one of the most iconic items associated with the Victorian era: The humble Metropolitan Police Whistle.
The Origins of the London Metropolitan Police
Established by Sir Robert Peel in 1829, the “New Police” or to give it its proper title: The London Metropolitan Police, was the world’s first modern police force – a state-run organisation of paid, professional officers, designed specifically to detect, deter, and solve crimes.
Prior to this time, ‘policing’ was often carried out by the civic guard, soldiers, parish constables, or the night watch, as in Rembrandt Van Rjin’s famous painting…
“De Nachtwacht” (“The Night Watch”) by Rembrandt Van Rjin
Here, you can see the men of the night watch, armed and protected with pikes and halberds (in the background), helmets, and muzzle-loading muskets (on the left and right).
The whole concept of the police was so new that Peel wasn’t even sure how it was supposed to operate. For example, police were originally expected to be on duty at all times, and to wear their uniform at all times. Then they changed it so that an armband on the sleeve of the uniform indicated whether the officer was, or was not, on duty. Finally, they decided that officers would only be on duty when they wore their uniforms, and did not have to wear them when they were not on duty!…things were very confusing! And it only got even more confusing when they actually had to fight crimes in progress.
The new London police service patrolled the streets day and night, working in timed shifts which covered specific quarters of the city (known as ‘beats’). If a policeman did one thing more than any other – it was walking. In the days before telephones and emergency-service numbers, a physical, visible police presence on the streets was the best way to detect and deter crime.
But what happened when crime was detected? A constable might try and combat the criminal himself, but if this wasn’t possible, then he would need to call for backup. This was usually done by beating his truncheon against fence-railings or along the pavement, or by swinging a heavy, wooden rattle round and round and round. The blades of the rattle snapped and clapped back and forth along the ratchet inside, making an almighty racket!
The problem was that the rattle was bulky, difficult to carry, heavy (it had to be large enough to make a loud-enough noise to be heard over the traffic, don’t forget), and it could easily be taken by a criminal and used as a club to attack the officer, if he so desired. On top of that, despite the rattle’s size and weight, it was not always distinguishable over the sounds of a busy city – thousands of pedestrians, horses, carriage wheels, market cries and the sounds of industry could easily drown it out.
This was why, in the 1880s, the police, finally fed-up with this inefficiency, decided to rethink the equipment issued to constables on the beat.
Enter a man named Joseph Hudson.
Joseph Hudson & Co – Whistle Makers
Joseph Hudson was a Birmingham toolmaker and whistle-manufacturer who had established his business in 1870. Moderately successful, Hudson was quick to see that what the police needed was not a heavy, bulky rattle, but something small, lightweight, easy to carry, and which could produce a deafening noise!…They needed whistles! And by gum, he was going to be the fellow who was going to provide them!
A competition was announced in the London Times newspaper, and competitors were encouraged to submit their entries, which would be compared and tested. Hudson started manufacturing his whistle, trying to find a design which would be loud, distinct, and portable. The story is often told that he got the idea for how the whistle should sound when he knocked his violin off his workbench. The twanging, reverberating strings gave him the idea that the whistle should be two-toned – one blow by the user should produce two different notes. Combined, they would not only be louder, but also very distinctive – anybody hearing the whistle would know at once that it was a police whistle.
The Original Metropolitan Police Whistle
Hudson’s whistle performed admirably in tests conducted by the police. It was loud, had a long audible range, was compact, lightweight, robust, and distinct. The police liked it so much that they asked Mr. Hudson to start manufacturing these new whistles at once! Joseph Hudson was so eager to fulfill his enormous new contract that a lot of the earliest whistles came with manufacturing faults, and had to be sent back to the factory for repairs – awkward…
The whistle and its chain
But eventually, they got the manufacturing processes and quality-control up to snuff, and in 1883, the London Metropolitan Police started carrying the new whistles. Rattles were to be handed in as soon as possible, and the new whistle was to be introduced to the force to replace it. Originally, the whistle was hooked onto the uniform tunic with a chain, and the whistle hung straight down the front. This proved to be less than ideal – the whistle and chain would flop around if the officer had to engage in a foot-pursuit, or a suspect could grab the whistle and pull it away from the officer.
Later, police regulations were changed so that the whistle was stored in the breast-pocket of the uniform tunic, with the chain-hook going through the buttonhole of the nearest available button. The chain hung out of the pocket in a “U” shape. This arrangement allowed for inspectors to see that their officers were carrying their whistles, while also keeping them out of sight. The hanging chain also made it easy for the officer to pull his whistle out quickly in an emergency, but wasn’t so long that a suspect could grab hold of the chain during a scuffle. This arrangement is still used today with police dress-uniforms.
The hook at the end of the whistle-chain
Police whistles were largely made of either nickel-silver, a nickel-alloy, or else were made of brass, and later plated in nickel. Which whistles were made of which material changed over time, depending on which metal was more available.
During the First World War, for example, J. Hudson & Co. actually had to make its whistles out of steel (donated by the Cadbury Chocolate Co. workers over in Bournville!) because the British government decreed that brass (the usual whistle-material) was required for the war-effort! But nobody needed the steel used to make chocolate-boxes and biscuit-tins, so it was used to make whistles, instead!
Dating Antique Police Whistles
As police whistles started becoming more and more popular, both in London and then further afield in the UK, and then around the world, mostly following the British model, manufacturers rushed to meet the demand. Other industries such as railroads, insane asylums, prisons, and countless other institutions and organisations suddenly realised how useful whistles could be, and they too, started putting in orders.
The earliest Metropolitan police whistles, as made by J. Hudson & Co., were produced in the company’s factory on 84 Buckingham Street, in Birmingham, starting in 1883. Within two years, demand was vastly outstripping supply, and Joseph Hudson was forced to close his original factory, and move to larger premises at 131 Barr Street, in 1884-85.
Even as the company moved manufacturing facilities, it also changed manufacturing processes, styling, stamps, and marks. This is what makes antique whistles so easy to date. Knowing how long and between what dates a company remained at a particular address helps you to date when a whistle was made.
The address of 131 Barr Street, on the whistle barrel
While changes in barrel markings and addresses can give you a date-range for when the whistle was made, more subtle changes in the whistle’s manufacturing can help to narrow down the date to an actual year. Variables such as the shape of the loop on the top of the whistle, the shape of the mouthpiece, and even the style and spacing of the branding-stamps on the barrels all changed over time as manufacturing techniques changed or improved. This is how it was possible to date this particular whistle to 1887!
How were the Whistles Used?
So far, I’ve covered why the whistles were created, what they were made of, and how they were dated, but how were they used?
The whole purpose of the whistles, like the rattles which they replaced, was to raise the alarm and call for assistance. In Victorian times, the only way for the police to respond to crime was to literally be there on the spot when it happened. There was no such thing as telephone or police radios in those days. Officers walked beats (timed patrol-routes) around their city, town or village, usually in shifts of one hour, after which they could return to the station-house for a break, a drink, a rest, and either go back out on patrol, or go home, if their shift had ended.
While out on the road, officers had no way of communicating with each other. If they spotted a crime in progress – a mugging, burglary, theft or even a murder – it was up to the officer on the scene to take charge of the situation. If the situation was more than he could handle, or if it suddenly went out of control – that’s what the whistle was for. Blowing the whistle as long and loud as you could would alert other officers on nearby beats that immediate assistance was required, and they would respond by rushing in the direction of the last whistle blast.
In this way, the whistle acted as both an instrument for calling backup, and as a siren, to alert people to what was going on. It also acted as a physical marker, so that people could hurry to the location where a policeman needed assistance, by following the sound of the whistle.
Police whistles remained in regular use from the 1880s up until the 1970s, when factors like improved portable communications devices, cars, and better electronics finally rendered them obsolete. They’re manufactured today largely for tourists, collectors, police dress-uniforms, and for historical reenactments or as movie- or television-props.
Collecting antique police whistles is a big hobby, and high prices can be paid for whistles which are particularly old, or which have rare stamps on the barrels, indicating that they were manufactured for, or issued to, different police forces or organisations.
Of the original J. Hudson whistles, probably the rarest or most collectible are the first-generation ones marked “84 Buckingham St.” on the barrels, because these were only made for two years. Even rarer than that are the handful of whistles from this time with even rarer markings on them. Rarer, because they were manufactured specifically for the various lunatic asylums around the UK at the time, and bear markings of the asylums to which they were issued. These whistles are among the most expensive, costing several hundred or even thousands of dollars each.
The second generation whistles, from the 1880s and 1890s, such as the one featured in this posting, are a little easier to find, although they are a bit more expensive than the average price for an antique whistle, due to their age.
I hope you found this glimpse into the history of whistles interesting. More postings along a similar theme are planned for the future, so keep an eye out for them!
I have been updating a few things on my blog over the past week or so, and one of those things was removing and updating the links and information in the “EXTERNAL LINKS” page on the side.
I have now added in a link for my eBay page! I’ve been selling antiques and collectibles online since 2015, and since the start of the pandemic this year, I’ve been slowly moving across to eBay.
As of the time of this posting, I’ve been selling on there for about six months. Feel free to shop and browse all the stuff on sale.
While I sell mostly to Australian customers, where possible, I’m also happy to sell to international customers, too. Just keep in mind that obviously, international sales will incur higher postage costs and longer delivery-times (especially with the coronavirus pandemic going around at the moment). If you decide to buy multiple lots, postage will be combined where possible, to save costs.
So, feel free to look around and bid! I’m also open to reasonable offers on most items. The link is the red button down below.
There was a time – now almost without living memory – when the first meeting between two hitherto unknown parties – started with the exchange of one’s cards, be they simple calling-cards, or more elaborate business-cards.
Calling cards and business-cards of all kinds, date back centuries, all the way to the Georgian era. In an age when refinement, politeness and decorum ruled supreme, there were prescribed ways of doing literally, absolutely everything, and guides and rulebooks to social, business, and visiting etiquette had a lot to say on the subject of cards.
In this posting, I’ll be going over card-cases – the little boxes, sleeves, or cases, in which these once virtually mandatory slips of paper were carried around in.
What is a Calling Card?
I have covered calling cards in an earlier posting, so I won’t go into too much depth here. If you want to find out more, check the previous posting here.
Essentially, calling cards were invented as a way to identify and introduce people if you were moving around in polite society. The idea that you just barged into someone’s house or office unannounced was considered the height of rudeness in the 1800s! You never just shoehorned your way into someone’s home or office without announcing yourself! How dare you!?
Presenting your card was a way for the occupant, owner or businessman, to know who was calling upon him, or her, and whether they wanted to accept the call, or not. You weren’t ‘visiting’ people, you were ‘calling’ on them. Hence ‘calling’ cards.
Almost everybody who could afford them, had calling cards. They could be small, large, medium-sized, plain, or incredibly elaborate. At the very least, cards contained the bearer’s name. As card-cutting and printing technology improved with the Industrial Revolution, cards became more and more elaborate and might include not only your name, but also your address, any professional, courtesy, military or aristocratic ranks or titles, your occupation…and by the early 1900s – things like your telephone number. It was around this time that the line that once separated ‘calling cards’ and ‘business cards’ started becoming more and more blurred, and nowadays, they’re usually one and the same.
In an age before voicemail, emails and paging, calling cards were a way to leave a discrete, neat, polite message, if you called on someone, and they weren’t available. You left your card, to show that you had been there. You might even write a message on the back, to indicate when you might return, how the recipient might contact you, or the reason for your call.
Calling cards became such a fixture of polite society and proper business relations that almost as soon as cards could be manufactured in abundance, card-carriers started needing to find ways to store their cards. It wouldn’t do to keep them stuffed into your pockets or crammed into your wallet along with the shilling coins, half-crowns, silver dollars and dimes – oh no! To hand over a wrinkled, marked, torn or otherwise imperfect card was a huge faux-pas!
It was for this reason that card-cases were invented.
The Victorian Card Case
Card-cases only started being manufactured from the mid-1800s onwards. Literacy, and more importantly – manufacturing processes – were increasing in efficiency and quality, which allowed for the creation of cheap calling cards, and this was what caused the creation of card-cases. Such cases were made of all kinds of materials, but their general manufacture doesn’t predate the Victorian era – cards simply just weren’t enough of a thing before the 1840s, to justify manufacturing cases specifically to hold them.
Card-cases were often made of mother-of-pearl or abalone, tortoise-shell, silver, or if you could afford it – even ivory! Cases varied in size from tiny, to enormous! Unlike today, there was no standard size in Victorian times, for how large a card had, or should, be.
Today, to aid the manufacture of things like wallets, briefcases, and card-cases, all cards – business-cards, credit-cards, transport and ID cards, even drivers’ license cards – are all made to the same dimensions. This sort of standardization did not exist in Victorian times, which is why Victorian card cases could vary widely in size, from a width of barely over an inch, to wider than two inches, from a length of just over three inches, to up to nearly five!
The majority of card cases were eventually standardised (more or less) at between three inches wide and four inches long, and maybe 2-3/8 of an inch thick – enough to hold a decent number of cards, while out and about on the town.
A sterling silver card case from my collection.
Since card-cases were often a reflection of the owner’s personal tastes, they came in a wide variety of styles, from plain to engraved, chased, repoussed…some cases were even sold with high-relief images of famous buildings on them, like cathedrals, the Crystal Palace, or notable country houses on the sides. Cases in silver, depicting particularly famous buildings, or which were made by particular silversmiths, are the ones which command the highest prices.
Buying an Antique Card Case
There’s lots of considerations to be made when buying an antique, or vintage card-case, and here, we’ll be going through them, bit by bit…
Size
When it comes to card-cases, size matters. And it matters more than you might think, because, like I said earlier – Victorian cards were not made to any standard size. Because of this, card cases also came in a wide variety of sizes. When purchasing a vintage one for your own cards, it’s important to know whether the case you like is even going to fit the cards you’ll put into it.
For this reason, when buying a card case, always carry a card (or even a slip of paper on you) which you intend to put into said case, to make sure that the cards fit in, and more importantly, that the lid closes!
Defects
For longevity, beauty and strength, most antique card-cases were made of silver, usually of a very thin gauge, or thickness. When buying an antique card-case, make sure that there aren’t any defects that will compromise the case’s usability.
For example: Keep an eye out for wonky or cracked hinges, splitting or separating seams, cracks from metal fatigue, or even wear-holes, from where the silver has been polished so extensively that it’s worn right through the metal! Also make sure that the case opens and closes smoothly and that the lid won’t accidentally drop open unexpectedly.
Materials
The vast majority of card cases were made of silver, but many other materials were also used. Popular ones included mother of pearl, abalone shell, and tortoise-shell. Since these materials were fragile, they were often just used for decoration. Usually, it was a veneer of shell, over a case made of wood, onto which the slices of shell were simply glued, sanded and polished.
The one exception to this was ivory: Often, card-cases made of ivory were made of sheets, strips and panels of ivory glued and riveted together. Ivory could be sliced thicker than tortoise-shell or abalone, which meant that the panels were stronger, allowing you to manufacture cases out of ivory using the ivory alone, without wood to reinforce it.
When purchasing a case made of natural materials, keep an eye on cracking, but also glue-failures. Over time, old glue dries out, gets brittle, and then the panels of nacre or shell, crack and drop off. Usually these flaws are repairable, but it’s important to check for these things in advance – once they fall off, these decorative pieces can be easily broken, and it’s better to know about this stuff before you buy it, rather than after, so that you can make allowances for it.
Another thing to be aware of is lifting and warping. Natural materials such as ivory, and tortoise-shell can dry out over the decades, and this drying can cause panels of ivory or sheets of shell, to crack, split, warp, and lift away from the wooden backing upon which they’ve been glued. Avoid any cases with defects like these, as they can be very fragile and difficult to repair. Trying to glue down a warped piece of ivory or shell will only cause undue stress on the panel of natural material, which could cause it to crack!
Any pieces which have simply dropped off due to age, however, can usually be sanded smooth to remove the old glue, and then simply carefully glued back into place, using modern adhesives, with no problem.
Clasps and Hinges
Apart from the materials that the case is made of, also check the workmanship of any moving parts. On card-cases, this usually means paying attention to the hinge that holds the lid together, and the clasp that keeps it shut!
Not all card cases have clasps or catches, but when they do, they’re usually spring-loaded, with little brass catches or hooks, and release-buttons built into the edge of the case. Make sure that the clasps hold the lid firmly shut and that the release-button can open it easily. The majority of silver card-cases were simply friction-closed, but cases made of wood and clad in natural materials had clasps, to ensure proper closure.
The two rivets holding in the hinge for the lid of the mother-of-pearl card-case
Pay particular attention to the main stress-point on all antique card cases: The hinge. These are often very small, and are only held in by a couple of rivets or a soldering-job, and a very small, possibly peened-over, hinge pin. This is where things like metal fatigue happens, and where pins, rivets and screws can work themselves loose or pop out.
Card-Cases Today
You can still buy calling-card or business-card cases today, and a number of companies still manufacture them, however, for anything flashier than punched steel, or brass, expect to pay a premium. In most cases, purchasing a card-case in sterling silver (the most common material in the old days), is best done secondhand – antique or otherwise vintage silver card-cases can usually be picked up in good condition, for anywhere between $200 – $500+, depending on condition. Cases made by famous manufacturers command a premium, and can have asking prices of well over $1,000. By comparison a brand-new silver card-case, from say, a company like Tiffany & Co., can cost upwards of nearly $700!
It’s one of the most common tropes of the Golden Age of Detective Fiction, from the 1880s to the 1950s! It appears in everything from Sherlock Holmes to Peter Wimsey, Poirot to Miss Marple – the vital clue – the incriminating message – the saving grace – written on a sheet of paper, flipped over, and then blotted on a sheet of blotting paper, which the killer, extortionist, blackmailer or other careless desperado – then – conveniently – forgets to dispose of! As Holmes would say: “There’s nothing so important as the study of trifles!”
Since the second half of the 1800s, desk blotters or blotting pads, have been a staple on every well-appointed desktop. Designed to hold a sheet of blotting paper where it was convenient, and handy for keeping spills, stains and marks off of the surface of your – presumably – very beautiful, and expensive desk – desk-blotters served a multitude of purposes: Coaster, food-tray, jotting-pad, blotter, and even a launchpad for the greatest ideas in the world!…the sheet of blotting paper detailing the original design for the “Crystal Palace” is one of the most famous in the world!
I bought this blotter pad at a local antiques store about three years ago for just $10.00. It was in decent shape, but the more I looked at it, the more I realised just how tired, worn out and in need of attention, it really was. The surface of the pad was covered in ring-marks from old drinks and the triangular, leather corner tabs were peeling and lifting from old age and the glue used to adhere it, becoming unstuck.
Removing the tabs from the blotter, so that I could resurface it.
Fed up with constantly having to glue the damaged tabs back down, over, and over, and over again, I decided to just pull the whole thing apart, and do a proper restoration!
Restoring the Blotting Pad
The first step was to do something about all these ugly marks on the surface of the pad. The actual structure of the pad was in excellent condition, but it wasn’t the prettiest thing to look at. I found some scrap leather in a nice, dark blue colour, and started measuring and stretching and trimming it to the right size. I spread down glue and pressed the leather over the top of the old pad. The leather would make the pad look nicer, it would last longer, and the softness of the leather would provide cushioning for writing – so it didn’t feel like you were trying to carve your name into the desk while writing.
To hide the raw edges of the leather, the next step was to fit in a ribboned border, with some matching blue ribbon. This was easy enough, although it took rather more glue than I had anticipated!
The final step was the hardest: Attaching the blotting paper tabs.
The original tabs were very flimsy – they were literally paper-thin sheets of leather glued and folded around pieces of paper! Something this delicate would be impossible for me to repair, so I decided to cut away all the excess underside paper, leaving me with just the upper leather tabs – the only part which would show.
I found some scrap leather, and using the tabs as stencils, I traced and cut out four identical triangles of leather. I glued the original leather tabs onto their new, leather backing pieces, and then I glued, and nailed, the tabs into the corners of the blotter pad. The pad was more than thick enough to fit the nails, and the corner-tabs would hide the unfinished edges of the ribbon border around the edge of the pad.
I had planned to just glue the tabs down, like they had been originally, but it was soon obvious that the thickness of the blotting paper would simply pull the tabs right up off of the surface of the blotter, and no amount of glue would be strong enough to hold the tabs down. So in the end, I decided that a few, tiny, discrete nails, carefully hammered into the right places, would be ideal. They would be barely noticeable, they’d fit in well, and be so small as to be virtually invisible.
The whole process took less than a day, and the end result was simple, elegant, and robust.
Concluding Remarks
Breathing new life into this battered and obviously well-used blotting pad was much easier than I originally thought it might be. My greatest fear was tearing the original tabs, because of how thin they were, but the whole restoration process was surprisingly easy. I had a choice, when resurfacing the pad, of using brown or blue leather, but since most of the pads I’ve seen were almost always some shade of brown, or other heavy, dark colour, I chose blue so that it would stand out more, and I think the results speak for themselves!
Once I’ve fitted out the blotter with fresh blotting paper, it’ll be ready to grace another desktop for another 100 years!
My ongoing love-affair with fine writing instruments, and desk accessories, was taken to another level this week, when I finally acquired – after many years of indecision – my very first PELIKAN fountain pen!
Pelikan is one of those pen-companies that the populous at large, are not overly familiar with. Everybody has heard of names like Parker, Sheaffer, Waterman, Montblanc, and maybe even brands like Visconti, Pilot, Faber-Castell, Sailor, and Namiki. Pelikan, by comparison, is relatively unknown outside of Europe. Most run-of-the-mill pen-and-paper shops won’t sell Pelikan pens – to find them, you need to visit pen shows, or more high-end pen-and-paper stores which specialise in higher-end or more refined writing instruments.
Despite this relative obscurity, Pelikan enjoys a good reputation among fountain pen collectors for the size, quality and dare I say it – variety – of their pens, which come in all kinds of colours, sizes, stylings, and price-points, from something like a little Pelikan M100, all the way up to an M1000! Passing through the M200, 400, 600, and 800, along the way.
This posting is going to be a review of the first Pelikan pen in my collection, the M800-sized limited edition known as the ‘Stone Garden’.
Why Buy a Pelikan?
Over the last two years or so, I’d been wanting to make a conscious effort of not only increasing, but also upgrading, my overall collection of antique, vintage, and modern fountain pens. To this end, I’d started selling off most of my lower-end, or otherwise unused fountain pens, writing accessories and unused inks to friends, and other collectors.
It was around this time that I started looking at new pens that I might want to buy. I’d had enough of American and British pens, such as Parker, Waterman, Swan, etc, and turned my sights towards Europe. Europe has a very rich history and culture of pen manufacture, and I wanted to add a sampling of this culture to my collection.
In Europe, the main pen-manufacturing countries are Italy, France, Germany, and Switzerland – yes, Switzerland! Don’t forget that Caran d’Ache is based in Switzerland!
Well. I already had a Visconti…and a Caran d’Ache…and I’d had my fill of Montblancs…and pens from other manufacturers seemed too far outside of my price-range for the time-being. Because of this, I turned my attention to – PELIKAN!
I had discounted adding a Pelikan to my collection for many years because of a sort of love-hate relationship that I had with them. Any pens which I could afford were too similar in styling to pens which I already had. Any pens which were different from what I had, were too expensive to afford! It really was a case of six-of-one and half-a-dozen of the other! So in the end, I turned away and put it all on hiatus.
That changed last year, when I found out that Pelikan had released the new “Stresemann”-style, to their famous “Souveran” line.
For those who don’t know – “Stresemann” is a reference to the early 20th century German politician, Gustav Stresemann, who was famous for wearing a stroller suit with a pair of pinstriped black and grey trousers. To pay homage to Stresemann’s distinctive style, the new pen was designed to be black, with silver trim and medium grey stripes and a shiny, white gold nib – very different from the usual monochrome offerings made by Pelikan, such as black, blue, green, red…usually in quite bright, vibrant colours.
The Pelikan ‘Stresemann’ model in silver-tones, black, and grey.
Initially, I had my heart set on getting a Pelikan Stresemann in Pelikan’s largest, M1000-size, and started price-hunting. I wanted a Pelikan that didn’t look like all the other damn Pelikans that I’d seen, and the Stresemann seemed to be the best bet! That is…until I saw the price. Naturally, being almost brand-new, it was extremely expensive! So I started looking at something a bit more affordable – a different model, perhaps. Or a different size?
That was when I stumbled across a curiosity of a pen that I found on the “Available Stock” page of a local online pen-and-stationery retailer. It was a Pelikan, alright – but not as I knew it! The cap was a rich, navy blue. The blind-cap was navy blue. Even the section was navy blue!
When every single Pelikan pen I’d ever seen in my life had contrasting black, you can bet that the contrasting navy blue certainly stood out! On top of that, the main area of the pen’s barrel was not just boring old stripes of blue, or red, or green…or even the grey of the Stresemann – oh no! This was much more interesting! It was a marbled, mottled, speckled brown and blue of different shades, all mingled up together, punctuated here and there by little specks of black!
This was something which looked so incredibly different from every other Pelikan pen that I’d ever seen, that I was immediately drawn to it! I was intrigued, fascinated, amazed! It really was a case of love at first sight!
Brown and dark blue, and dark blue and gold, are three colours that all go together beautifully, and here they were, all combined together into a single entity! I knew at once that this was the pen for me, and that I absolutely had to get my hands on one by any means necessary! I always told myself that if I did ever get a Pelikan, then it had to be one which stood out – and boy howdy, did this one ever!
Und so!The hunt begins!
Acquiring the Desired Pen…
I don’t believe in any form of God, higher-power, angels…guardian or otherwise…wizards, pixies, elves, halflings or little people…but for some reason, I always seem to be able to find the best deals on almost anything that I’m looking for, when it comes to adding things to my collection. I guess I’m just obscenely lucky…or patient!
I trawled several online sellers of fountain pens to try and find the best deal for this pen, both locally, and internationally. Every seller which I came across was selling the pen for an absolutely insane price. $800-$1,000+ was the most common price-range that I found…and that didn’t include international shipping and any taxes or insurance that went on top of it! Add it all up and even at the cheapest level, the pen would still cost $1,000!…not a price I was willing to pay! Especially for something that I was going to be buying secondhand – which I would almost certainly have to do, since the pen hasn’t been manufactured for two years!
A conversation with a friend – if she’s reading this, she knows who she is – hey!! – directed my search to a fellow member of a local pen collector’s group on Facebook. He had two such pens for sale! He’d already sold one, and by sheer happenstance, I’d contacted him just at the time when he was thinking of selling the second one!
His price was significantly cheaper than anything that I’d seen anywhere else, even with the cost of postage thrown in! It took me about a week to make up my mind to buy the pen, and it took less than a week for it to be delivered! The benefits of finding a local seller!
The Features of the Stone Garden Pelikan
The Pelikan Stone Garden L.E. fountain pen is a special edition, a variation on the more common Pelikan Souveran M800 line, upon which it is based. As such, it shares all the common characteristics with the rest of the M800, and larger M1000 line from Pelikan.
Piston-Fill Mechanism
One of the reasons why I started getting interested in Pelikan pens is because, much like their sibling, Montblanc (you know, the younger brother who was always hotter, cuter, more popular at parties, and more famous among all your friends…!), large-sized Pelikan pens are all piston-fillers. This means that they have an internal mechanism that draws ink up inside the pen, using a screw-actuated piston-mechanism inside the barrel, operated by the knob (or “blind cap”, to give it its proper terminology) at the back end of the barrel.
For those who might not be aware of this – Pelikan actually invented the piston-fill fountain pen! So if piston-fillers are your thing, then you have Pelikan to thank for their existence!
The piston-filler on the Stone Garden is EXTREMELY smooth. It requires no effort to fill or empty the pen, and exactly five turns of the blind-cap is all it takes to complete either operation with no issues at all.
Another feature of the M800 and M1000-series of Pelikan piston-fillers is that these pens, unlike the lower-grade, 600, 400, 200 etc, series, come with a brass piston-filling mechanism…as opposed to the cheaper, and less robust plastic mechanisms used in Pelikan’s other pens.
Of course, that’s not to say that the plastic piston-mechanism aren’t as good, but when you’re paying for something like a limited edition collectors’ piece, you want a filling mechanism that’ll last as long as the rest of the pen does!
Removable Nib-Unit
Another feature of the M800 series (and indeed, all Pelikan pens) is the ability for Pelikan nibs to be swapped out for other nibs! This is easily done by gripping the nib and feed together in your fingers, and carefully unscrewing the whole section. The threaded feed and collar, with the nib included, then simply slides out once it has been unscrewed the appropriate number of times.
To change nibs (for writing preferences, or to replace a broken or damaged nib), simply screw the replacement nib-unit back into the pen! Hey presto! Of course, it has to be a nib-unit from an identically-sized pen! An M1000 nib won’t fit into an M800, and M600 won’t fit into an M1000, and so-on. Be sure you know the size of your pen and be very specific when searching, or asking for, a replacement!
I swapped out the nib in my Stone Garden from a Broad Italic down to a Fine, simply because European nib-sizes are quite generous and juicy, and I wanted something that wasn’t too wet that would flood my writing, bleed through the paper, and feather across the page during one of my long-haul writing marathons!
Another fantastic benefit of the removable nib-unit is that it makes the pen extremely easy to clean! You can literally unscrew the nib and feed, pull it out, pour out all the ink, wash everything out incredibly thoroughly – and then simply screw it back together again!
Ink-Window – Or Lack Thereof…
This is, probably, the only strike that I have against the Pelikan M800 Stone Garden – the lack of an ink-window, a feature that almost all regular Pelikan pens have…but which this limited edition, owing to its method of construction, does not.
The ‘Ink Window’ is the name given to the transparent midsection of the barrel, just above the section. You often find it on piston-filling pens, and it’s a convenient way of telling how much ink is left inside your pen. On Montblanc and Pelikan pens, the ink windows are discretely worked into the decorations and body of the pen barrel, which means that they can perform their functions without sticking out like a sore thumb.
While this pen does not have an ink-window, somehow, I think it looks better without it. An ink-window would disrupt the nice blue-brown contrast between the section, barrel and blind-cap at the end of the pen.
The Pelikan Stone Garden: First Impressions.
The pen is very neatly presented, and packaged, in a cardboard “PELIKAN” box, and wrapped in a white, leatherette sheath held shut by a dark red elastic band with a red disc on it. The whole design gives the impression of a scroll tied up with ribbon and held shut with a seal of red wax, with the pen nestled neatly inside. It’s a big departure from how many other pen manufacturers package their merchandise, and it really stands out!
The pen is light, and comfortable to use. It’s medium-sized and is similar in length, girth and weight, to the Montblanc 146 ‘Le Grand’ model. The section threads allow the cap to be removed easily and cleanly, without exerting too much force or having to twist endlessly to find the end of the thread. Three quarters of a full turn is enough to remove the cap.
The clip on the cap is flexible, but strong, and the filling mechanism is extremely smooth and easy to use. The cap may be posted on the end of the barrel, and sits very securely, with no wobbling or loosening over time, while you write. The gold-trimmed cap-band reads: “PELIKAN SOUVERAN GERMANY”, referring, of course, to the company name, the product line, and the country of origin.
The Pelikan Stone Garden: Writing Experience.
As with most of Pelikan’s higher-grade fountain pens, the Stone Garden comes complete with an 18kt two-tone nib with decorative looping, and the “Pelikan and Chick” logo set in yellow gold. The nib is marked “18c – 750”.
The pen wrote wonderfully smoothly, with a good, strong, consistent line, most definitely on the ‘wetter’ side of the spectrum – a characteristic of European pens, which always seem to be more generous in their ink-flow. There was no skipping, hard starting or any other issues that sometimes plague other pens, and first, and subsequent impressions, continue to be very favourable.
Pelikan Stone Garden: Size, Weight, Balance, Feel.
The pen felt wonderfully light in the hand, but not unsubstantial, or otherwise indicative of being poorly made. It’s definitely an excellent pen for substantial writing, involving pages and pages of longhand cursive.
Even with the cap posted, the pen is well-balanced, and there’s no sensation that posting the cap might encourage the nib to lift away from the paper. The pen is fairly large, but comfortable to hold in the hand, without the fingers becoming too crowded around the section. All in all, a very pleasant writer.
Concluding Remarks
All in all, I think the Pelikan Stone Garden is an excellent pen, well worth any amount of money that someone might spend on it. It’s attractive, comfortable, has a large ink capacity, and solid inkflow. The pen’s filling mechanism is smooth and easily operated.
The unusual colour choices for the cap, section, blind-cap and barrel make the pen unique, and it stands out from the crowd, without being tacky, conspicuous, loud, or excessively showy.
The pen fills and empties easily, is very simple to clean and maintain, and all up, makes for a very pleasant writing experience. All up, the Pelikan M800 ‘Stone Garden’ is a worthy addition to any serious collection of fine writing instruments.
If you visit any decent department-store or online retailer, watch-shop or jewelry shop, there’s no end of variety when it comes to boxes, cabinets and cases in which to store your jewels, cufflinks, earrings, necklaces…and watches!
For the avid watch-collector, a watch-winder or watch cabinet to store your wristwatches in, becomes an absolute necessity when your collection grows to beyond three pieces. If nothing else, the empty spaces in the cabinet serve as incentives to buy more watches!!
Back when it was common for men to carry pocketwatches, jewelers and retailers, watchmakers and tobacconists used to sell all kinds of pocketwatch accessories. Fobs, chains, cabinets, and cases. They also used to sell individual pocketwatch stands where you could put your watch when you weren’t wearing it. These might sit on your desk, so that your watch could double as a desk-clock, or else, on your bedside table, where you would place your watch before going to sleep each night.
Pocketwatch stands are still manufactured today, and you can buy them easily online, but for an antique pocketwatch, the best thing to store it in when you’re not wearing it is an antique pocketwatch stand!…and that’s precisely what this posting will be about.
The Watch-Stand: A Closer Look
The stand was made by the Birmingham firm of Syner & Beddowes in the early 1900s, making it well over 110 years old. It’s made of wood, clad in a paper-thin leather veneer. The interior was originally bright green silk and felt, padded out with panels of wood and cardboard. The front of the stand is faced with a panel of sterling silver.
Stands such as this were common in the late 1800s and early 1900s. They came from huge ones for massive, eight-day “goliath” pocketwatches, all the way down to tiny dinky little ones, for ladies’ pocketwatches. They would’ve been purchased from any watch-shop or jeweler’s shop which catered to a discerning clientele.
Why Restore the Case?
I wanted to try and restore the stand for a number of reasons. First, they’re getting pretty rare these days, so throwing it out wasn’t an option. Two, it wasn’t too badly damaged, and it looked repairable. Three, I wanted somewhere to put my watch when I wasn’t wearing it!
Nobody makes watch stands like this anymore, and sure as hell, nobody is making a living out of restoring them, so the only option if I wanted to use the stand, was to fix it myself.
Restoring the Watch Stand…
After deciding to take the plunge, I went to get all the tools I needed: Files, sandpaper, a chisel, pocketknife, glue, etc, etc. And then, the first stage began.
Step ONE: The Teardown
A ‘teardown’ is restorers’ jargon for the disassembly process. It’s usually called a ‘teardown’ because that’s literally what you’re doing – ripping the item apart, and getting rid of any old pieces that can’t be used anymore. While it is fun to rip things apart, you do have to exercise caution. On an object this small and this old and fragile, any overexertion or undue eagerness could destroy the stand forever, and render it irretrievably damaged.
The first step was to remove the ring inside the base of the stand, which holds the pocketwatch in place. This had at least two big rips in it, which meant that it no longer held its shape (and therefore, was unable to hold a watch). The ring was simply glued in place, so it was pretty easy to just grab it and carefully peel it out. When I removed it, I was surprised to find that it was comprised of exactly one piece of green felt which had simply been folded over a stiff, cardboard ring…and simply glued in place! No wonder it didn’t last!
The next step was to remove the circular pad of green felt underneath the ring. This also, was pretty easy. Underneath this, I found several cardboard discs, which had been used to pad out the watch-stand, and to stop any watch housed inside, from rattling around. for something so small and narrow, there were a surprisingly large number of these cardboard discs inside! Up to half a dozen or more!
The next thing to remove was the felt-covered wooden base which the ring, the cardboard discs and the felt liner, all rested on, or in. This was somewhat more difficult, as it was glued very firmly into the back of the watch stand! If I exerted too much force, then the whole thing would break apart. Using my pocketknife, I slowly jemmied away the base from the back of the stand, cutting and levering up, slicing away the glued-down cardboard and crusted glue and wood, until the whole piece finally popped out as one.
Step TWO: Building a New Base.
Using the old base as a guide, I cut out a panel of plywood, chiseled and sanded it to the right size, and then covered it in blue cotton fabric which I glued down over the wood. I folded everything over, trimmed off the excess, covered the raw edges with another piece of the same fabric, and then glued it on.
Putting the new base into the stand was surprisingly easy – just shove it in. The friction alone will hold everything in place! Before doing this, however, I took advantage of the stand’s now relative lack of structural integrity to replace the ribbon strap that originally ran from the inside of the back of the stand, out the back of the case, and which attached to the backside of the prop-stand that juts out from behind the stand. This strap allows the watch stand to…stand up…and lean back at a slight angle. Without it, the prop just slides open and the whole thing topples over. This was a very easy fix, using some ribbon and glue.
Once that was done, I started rebuilding the ring that fits on top of the new, blue base!
Step THREE: Replacing the Ring.
Replacing the ring was of paramount importance. It had to hold the watch in place, and it had to stop it rattling around (something that the old ring couldn’t do because of its poor condition and flimsy construction). So for this ring to last, it had to be made of the most solid materials possible.
I used a piece of PVC drainpipe.
Our house had been renovated fairly recently, and the builders had left behind several sections of unused drainpipe. One of these was precisely the diameter that I needed for the watch-stand. Now, it was simply a matter of measuring the right dimensions, cutting off a section, sanding it to the right size, and fitting it in.
To hide the fact that I used a plumbing fixture to fix a 115-year-old antique, (“We found a witch! May we burn him!?“) I wrapped it in the same blue fabric I’d used for the base. I glued it all in place, trimmed off the excess, and then simply folded in the raw edges. To secure all this to the base, I dropped in one of the cardboard liner-discs from earlier (see step one, above), which I had also covered with the blue fabric.
Because the pipe was precisely the right diameter, the cardboard disc dropped in exactly as I wanted it to. I deliberately used the thickest, most structurally intact disc I could find. Then it was simply a matter of covering it all in glue, putting it together, positioning it very carefully over the center of the base, and sticking it all down!
Step FOUR: Replacing the Strap
The stand originally had a silk ribbon strap that ran from inside the back of the stand, and which attached to the back of the prop that holds the stand upright when it’s in use. You could still see the little slots and grooves where the ribbon used to fit in. Finding some thin, black ribbon to replace this was pretty easy. It was just a matter of measuring out the right length, and sticking it down.
Step FIVE: Tidying Up
The final step was gluing down all the loose bits and pieces, polishing the silver and the leather exterior, and then putting in the watch! The results speak for themselves:
Not a bad result for trying to fix something that’s over a hundred years old, and especially for being as fragile as it is!
I purchased this last week, as a slightly late birthday treat for myself – it’s been a long time coming, but it’s finally arrived – a piece that I’ve been trying to find for nearly a decade to add to my collection! With its addition, I can finally say that one part of my pen collection has finally been completed!
The Backstory – And a Very Long Wait
Writing has been my greatest hobby for as long as I can remember. In one form or another, I’ve been writing for nearly 30 years. I find it fun, and relaxing. I love the freedom to literally create whatever I want – characters, settings, scenarios and ideas, story-arcs and adventures of almost any possible…or even impossible…description. Nobody can tell me that it’s impossible, or ridiculous, or stupid, or that it can’t be done, and you’re only held back by your own imagination.
My deep love of writing meant that, from a very young age, I always had a great interest in fine writing instruments. Fountain pens have been my weapon of choice when it came to the physical act of writing, ever since I was seven, and ever since then, I have barely touched a ballpoint.
Along with writing came my equally fetishistic love of history and antiques! This meant that, alongside fountain pens and dip pens, I soon developed a fascination with writing accessories and desk accessories – inkwells, blotters, letter-openers, bill-spikes, pen-cleaners, and any other strange, weird, whimsical doohickeys which I could use to make my writing experience more enjoyable.
I don’t remember exactly when I started getting interested in the famous Montblanc No.149. I was a teenager when I first spotted it, and decided that I wanted one! It was my dream throughout my schooldays to have one. That said, anything Montblanc is expensive, and being a simple student meant that there was no way I could afford one – certainly not at retail prices!
I spent years reading and researching, looking at photos and watching videos and auctions. Even when one did show up, I was always outbid, so I never thought that I’d be able to own one.
The Montblanc Meisterstuck No.149 “Diplomat”. Arguably the most famous fountain pen in the world.
That is until last year, when I scored a Montblanc 149 in a box lot of other pens (all of which I’ve now sold). Out of this treasure trove, I kept the 149 as my prize! While the price for the box of pens was fairly high, it was still less than half the price of a brand new 149, so you can imagine how cheap the pen was, once you averaged out the cost among all the pens in the box!
Being no fool, naturally I examined the pen on an almost atomic level before bidding on it, to make sure that it was real. Montblanc products are among the most faked items in the world, alongside luxury handbags and Rolex watches!
The Montblanc No.149 Matching Desk Set
During all my years of looking at what fellow collectors have jokingly described as “pen porn” on the internet, I was made aware of the fact that the Montblanc No.149, as famous as it is, was only one part of a larger set of items! This was when I discovered that there was actually an entire set of desk accessories that went along with the pen, and that they were all designed to match.
Given how long it took to buy the pen, I didn’t have any great hopes that I’d also be able to buy the set that goes with it. However, I managed to score both the inkwell, and the desk-pen base relatively easily – not something that I was ever expecting! They were being sold secondhand, and I was able to get them for a good price.
The Meisterstuck Inkwell
The next piece to add was the blotter. Or, at least, I could dream about adding the blotter, because even a cursory glance at all the various eBay listings told me that it would cost a small fortune! Even at its cheapest, it would still be several, several, several hundreds of dollars, and many times, it was well over $1,000!…and that didn’t include extremely high postage-costs due to overseas shipping! Not even a secondhand No.149 cost that much! The more I looked at it, the more I began to think that perhaps this was a piece that I’d never be able to get – the chances of buying one for under $1,000, or even under $500, seemed impossible!
As my latest birthday approached, I started browsing eBay rather absent-mindedly, wistfully looking at all the stuff on sale, and typing in just random combinations of words to see what would pop up on the screen – stuck in lockdown over the coronavirus, I didn’t have much else to do! And it’s fun to see what kinds of things you’d like to have as a birthday treat, even if you can’t afford them, right?
The Meisterstuck desk-pen stand for the Montblanc No.149 fountain pen.
That was when I spotted, by pure chance, a group-lot of vintage Montblanc items up for sale. For some reason, the wording of the listing meant that it had never popped up in any other search until now. I clicked on it just out of curiosity. The opening image in the listing was very misleading, which is probably why I never noticed it before, but when I realised that part of the lot was the blotter that I’d wanted for so long, I started paying much more attention! The asking price was fairly high, but pretty reasonable, for a group-lot of Montblanc things! Just one of the items in that lot sells for $1,000 brand new! Out came the calculator, and I started number-crunching to see just how much of a bargain all this stuff might be, and whether it was really worth it!
It took me all of half an hour to decide that it was a worthwhile price. When I realised how many other people were checking out the listing alongside me, I decided not to wait! I knew that it’d be years before another chance like this ever came along again, so I bought it, as a birthday treat for myself!
Yes, the price was fairly high, but I consoled myself in the fact that I could sell the other items in the lot for a healthy profit, and keep the blotter for my collection.
How Old is the Montblanc Meisterstuck Desk Set?
Honestly, I don’t know. I haven’t found any solid documentation giving me start and end-dates. I believe that this particular style of desk set was manufactured in the 1990s, based on what little information I could find, but that’s about it.
Is this the only type of Montblanc desk set out there?
Oh, certainly not! There’s at least five, which I’ve been able to identify. Their details are below:
First, there is the solid glass “Lalique” set, with inkwell, blotter, and pen stand, made of beautiful cut glass, and which is named after the famed French glassware designer, Rene Lalique.
Next comes the black resin and acrylic “Meisterstuck” set with goldtone trim, which is designed to match the look, styling, and materials of Montblanc’s most famous pen – the Meisterstuck No.149. This is the set that I’ve been collecting.
The third set which I’ve identified is the sterling silver “Solitaire” set, with an inkwell, pen-stand and blotter, which is identical to mine, but with one major difference – that the trim is sterling silver and gold, instead of black resin and gold. It’s quite striking, actually!
There’s a black resin and polished brass set from, I believe, the 1960s or 70s, which I’ve seen at various places online, and finally, there’s also a set covered in black leather, which is Montblanc’s latest offering when it comes to desk accessories. The various elements for this set are currently available from the Montblanc website (and other, Montblanc-affiliated dealers and stockists).
The sets are not all consistent, and there are minor differences between each one, in terms of what’s included in them, the finishes, and shapes and styles. These are all the Montblanc desktop accessories sets which I’ve been able to identify. There may be others out there which I’m yet to see, but those are all the ones which I’ve been able to definitively identify.
So, is your set complete?
Believe it or not – but – no! The full set is actually five pieces, not four!
The last piece is a matching paper-knife or letter-opener, again in black resin, clear acrylic and gold-plate. However, in all my years of hunting and searching, I’ve never seen it! I’ve never seen it on eBay, I’ve never seen it at auction, at flea markets, pen shows, pen shops…I don’t even know anybody who owns one!
The only reason I know it exists is because I saw it included in a photograph of the full and complete desk set in a very old auction listing online somewhere, but I’ve never seen it for sale. It seems to be something so rare that nobody has one, “not even for ready money!”, as they said in ‘The Importance of Being Earnest‘.
The last time I saw a Montblanc-branded paper-knife of any description for sale on eBay, the asking price was over $1,000…for a paper-knife…and it wasn’t even the one that goes with my set! So, I don’t think I’ll ever be adding one to my collection…not that I’d use it, even if I could, so it’s probably just as well!
The Montblanc Meisterstuck Rocker Blotter – A Closer Look
Since the blotter is such a rare item, I thought it’d be good to write about it in detail, and try and give as much information on it as I can, for anybody else out there who might be trying to buy one! I’ve never been able to find very many detailed photographs of the blotter, and like I said earlier, there’s almost no information about it online anywhere!
I guess that’s what happens when something’s as rare as this. But first…
What is a Rocker Blotter?
If you watch a lot of period dramas, old movies, or if perhaps you’ve visited the museum-homes of famous authors, then you might’ve seen one of these things sitting on a desk somewhere. They used to be extremely common.
The glossy, black resin upper section of the blotter.
The purpose of a blotter is to soak up or absorb excess ink on a written page by a fountain pen or dip pen. Since these pens use liquid, water-based ink, it may take some time to dry – especially if the paper is not especially absorbent, or if the line laid down is particularly wet or broad (for example, in various styles of calligraphy). In instances where you can’t, or don’t want to wait for the ink to dry naturally, you rock the blotter back and forth across the wet ink to dry it faster. The excess ink is absorbed by the sheet of blotting-paper affixed to the underside of the curved blotter base, and the writing on the page is now dry.
The underside of the blotter (without paper inserted), showing the transparent, acrylic base.
Blotters were extremely common throughout the Victorian era, and lasted well into the 20th century. The heyday of the blotter ended in the 1950s when ballpoint pens started replacing fountain pens, but there are still plenty of companies out there which manufacture blotters, and there are many craftemen and woodworkers who produce them for people looking for brand-new rocker blotters for their desks. Apart from modern luxury blotters like those made by Montblanc, the J. Herbin ink company also manufactures blotters and blotting paper.
Anyway, back to the Montblanc blotter…
The blotter, like the inkwell and pen stand, is covered in Montblanc’s well-known, glossy black resin – the same substance used to make its famous pens. The edges are trimmed in gold plate, and the main body, or base of the blotter is smooth, transparent acrylic, much like the pen stand, and inkwell.
A side-view of the blotter, showing the acrylic base, the resin top, and the two, raised, gold-tone decorative lines that run along the sides.
The slip of blotting paper that fits underneath the blotter is cut to size, and then folded and slipped into the two tabs or ridges on the ends of the underside of the blotter, and are simply held in by friction. In this instance, it’s better to use thicker, or double-folded blotting paper, rather than thinner paper, since thicker paper will hold more securely.
The blotter, with paper inserted. The folded ends of the paper simply tuck inside the tabs at each end.
I want one! Where to Buy!?
Oh boy…
Getting a set like this is not easy. And not just because of the potentially, very high prices involved.
No.
The reasons why it’s not easy (difficult, but not impossible) are because of the following:
One – the set was a limited edition. My research says that they were only made for about 10, maybe 15 years. So that means there’s a limited number out there. This set is no longer manufactured by Montblanc.
Another reason is that this roughly ten-year gap was at least twenty years ago, in the mid to late 80s, up to the late 1990s. So if you want to buy the set, you have to buy the pieces individually, and they’ll all be secondhand.
Thirdly – because the set is vintage, and a limited edition, the prices could be extremely high. I’ve seen asking-prices on eBay for the various elements of the black resin and clear acrylic desk-set, of over a thousand dollars…for EACH piece. And while I don’t doubt that they might possibly be worth that (or something close to it), due to their age and relative scarcity, it’s a lot of money for most people to cough up, and that also makes them tricky to find.
The one good thing about these desk accessories is that, unlike the pens – nobody is faking these. They’re so rare that the chances of finding a genuine one to use as a model from which to make fakes, is very difficult, so, given their rarity, you can be sure that if you find one on eBay, or elsewhere, that it will be the real deal. Provided that the price is something you’re willing to pay, you can buy them with confidence, which is not always the case with Montblanc pens, which are among the most faked items in the world.
The glamour-shot with all the pens and trinkets lined up!
I love antique whistles. They’re such fascinating little devices, and they’re proof that just because something is an antique, doesn’t mean that it has to cost a fortune.
I’ve been collecting antique whistles for years, and have a small collection of whistles at home, which range in age from anywhere from 70 or 80 years old, up to over 100 years old. I’ve never been an active collector, but if I see one lying around that I don’t have, and which is in good condition for a good price, I tend to add it to my collection if the opportunity presents itself.
The latest addition to this small area of my much larger, overall collection, is the subject of today’s posting.
Why Collect Whistles?
Antique whistles are infinitely fascinating. They’re symbols of how times have changed, how work has changed, how technology has changed and how manufacturing has changed, over the last few hundred years. They come in an almost endless variety of styles and finishes, and all these variations tell their own little stories – they are pocket-sized pieces of social history…that you can play around with…and unlike most antiques…are so robust that you almost never have to worry about breaking them!
Before the days of mobile phones, portable radios, walkie-talkies, megaphones and all the other handy dandy electronic communications devices that we take for granted nowadays – whistles were the only way that people had to communicate over long distances, or under adverse or busy conditions. This is why they were so incredibly common, and popular.
Whistles were common in a wide range of occupations and professions. Ship’s officers carried whistles to pass orders. Railroad workers carried whistles to signal to other staff and locomotives. Cyclists used to carry whistles on them to warn pedestrians when they were coming through. Policemen carried whistles to call for backup, postmen carried whistles to alert people when they had mail to collect, prison guards carried whistles to maintain order inside prisons, and orderlies in mental hospitals carried whistles to warn of patient riots. During World War Two, ARP wardens carried whistles during air-raids, and during both world wars, army officers carried whistles for issuing commands on the open fields of battle.
In many occupations, there were strict regulations regarding the use and care of whistles. For example in many police forces, whistles had to be clipped to the uniform by a chain so that it could be easily retrieved. In the postal services, whistles that were handed in when a postal-worker retired, had to be sterilised in boiling water before they could be re-issued to new staff. How whistles were used in these various professions were also regulated – how many whistle-blasts were used, what they signified, and under what circumstances they had to be used.
It’s all these varied uses that make whistles so collectible, and manufacturers produced whistles with all kinds of markings, stamps and labels on them as a result. That means that just one standard type of whistle might have dozens, or even hundreds of different markings, depending on which company or entity had ordered the whistle. It might be marked for police use. Or army use. Or postal use. Or use in a hospital, or prison. Or for any other myriad of purposes. Whistles with rare or unique stamps or marks on their barrels are more valuable, and they’re a useful way of trying to determine a whistle’s age.
How old is This Whistle?
This whistle dates to the turn of the last century, which makes it roughly 120 years old. It’s solid brass, and was once plated in nickel. It’s marked:
“THE CITY WHISTLE – PATENT”.
Underneath, is the additional marking:
“ARMY STORES – MELBOURNE”
And finally, it has the country-of-origin markings:
“MADE IN ENGLAND”
Antique whistles are usually extensively marked, and this is good, because it means that they’re very easy to research. Every major manufacturer had their own marks, stamps and trademarks, which were all used at various times throughout history. These variations – which can be something as simple as the formatting, the style of lettering, the size of lettering, or even the orientation of the lettering – can all be used to identify the whistle’s age and manufacturer.
In this case, “THE CITY WHISTLE” with the first two words curved, and ‘WHISTLE’ straight, with “PATENT” underneath – indicates that the whistle was made by the Birmingham firm of Alfred DeCourcy & Company, which was the main competitor for much of the 1800s and early 1900s, to the more famous Joseph Hudson & Co whistle manufactury…or it was, until Hudson & Co bought them out in the 1930s.
Changes in manufacturing processes and little style details also indicate the whistle’s age. Concave cap-loops, and variations in how the mouthpieces were formed, are further indications of the whistle’s age. This whistle was made between 1900 – 1910.
Is it a Rare Whistle?
Probably, yes! It was made by a lesser-known manufacturer, and for a small client, in a far-off country. On top of that, it’s over a hundred years old. All these factors would increase the whistle’s rarity, and presumably, it’s collectible desirability – it’s the rare whistles with uncommon markings that ardent whistle-collectors really want, due to the sheer uniqueness of them.
So…does it work?
Yes! Yes it does. Or it did, once I tweaked it a bit and got it working again.
Despite their apparently simple, tubular construction, these old whistles were very carefully manufactured. Inside the barrel is a flat diaphragm which splits the barrel lengthwise into two chambers. At the mouthpiece-end of the diaphragm is a circular endpiece that stops just below the bottom of the two sound-slots at the bottom of the barrel. There are two tiny semicircular gaps between the edges of the round endpiece inside the barrel, and the interior of the barrel and sound-slots.
It’s through these two gaps that the air passes when you blow on the whistle. Air passes through the mouthpiece and through these two gaps. It’s the passage of air which creates the trill, rippling, warbling, two-toned sound of the whistle.
…which won’t be produced if these two gaps are clogged or sealed up in some way! To fix it was a simple case of clearing out the gunk inside the mouthpiece and around the vent-holes using a pin, and levering out any dents around the slots using a flathead screwdriver and gentle pressure. Once the sound-slots near the holes had been opened and cleared sufficiently, the air could flow smoothly through the whistle, which meant that it could sound exactly like how it should!